How to Map a Network Drive
By mapping a shared/network drive, you’re essentially adding a folder that has already been shared on your network to the list of drives you can access on your own PC.
Mapping a shared drive is quite simple as long as you know the shared folder that you want to access. To map this drive to your PC please follow the steps below.
1.Locate the shared folder that you want to map. Make note of the folder’s location/name eg. \ShareExample.
2. Click on the folder icon on the bottom of your screen in the task bar.
3.Click “This PC” or “Computer” depending on your windows operating system version.
4.On the top bar there should now be either of the following options. “Computer” or “Map Network Drive” if you have the “Computer” option, please click on it and it will then display the “Map Network Drive” option. Either way, click on the “Map Network Drive” option.
5. This should now present you with a box that looks like this.
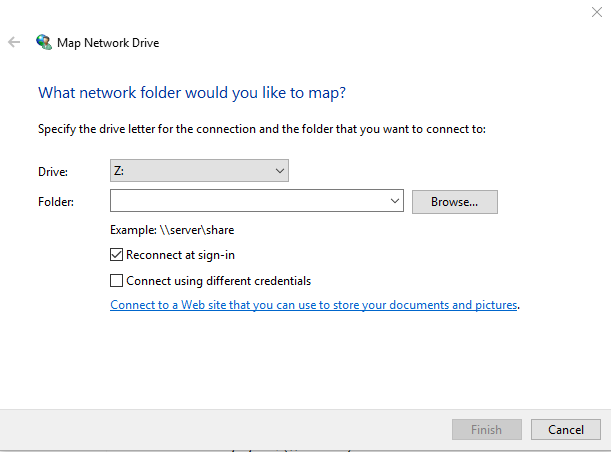
6. In the “Folder” area, please enter the folder share that you made note of earlier (E.g \ShareExample). You’ll also need to choose a drive letter, this can be any letter you like but it’s good working practice to have a letter that accompanies the share name, for example if you were to have a “Personal Drive” this could be associated with the drive letter of “P”.
7. Once this is entered please click the finish button and the folder will appear as a mapped drive.
8. Once you click on the drive (Depending on your server set-up and configuration) you may be prompted to enter some credentials, these will be the credentials that are required to access the shared folder on the network. You may need to ask the IT team to grant you permission to access it.